Table of Contents
Join A Queue From celitoMobile (Softphone)
This process can vary depending on your particular configuration; the instructions below are meant to serve as an example. You must configured as an Office Manager/Admin in our system in order to make these changes. Please contact celito support if you have any questions or would like us to make these changes for you.
Details
When a phone is added to a queue, you're adding the actual phone device rather than a user. That means if a user has more than one phone, like a physical desk phone and also the celitoMobile softphone, both of those devices must be added to the queue if you want to receive calls on both.
Instructions
When you use celitoMobile for the first time, it will create a new lettered extension as a device on your account. It will almost always be XXXwp (example: 1009wp), but the steps below will help you look up the correct extension/device. Once you find the device and add it as an authorized device in the queue, you will be able to join and leave the queue and receive calls from it.
Find Softphone Extension
You must have logged in to the softphone at least once for this extension to be created.
- Navigate to
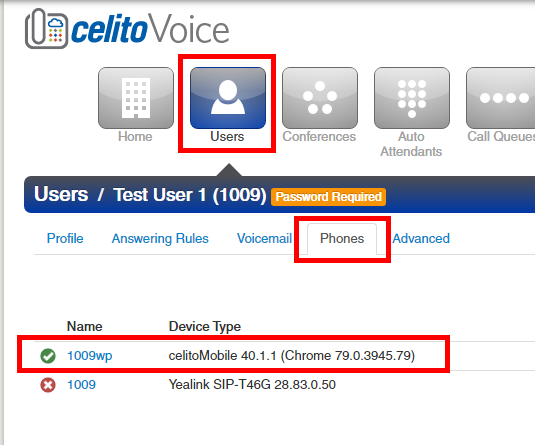
Users>The user you need to add to the queue>Phones - You should have a Phone listed where the name ends in
wp. The Device Type should show celitoMobile.
Add Extension to Queue
Now that you have the extension, you need to add it as a device that is capable of logging in/out of the queue. You'll want to repeat this for each queue you are trying to participate in.
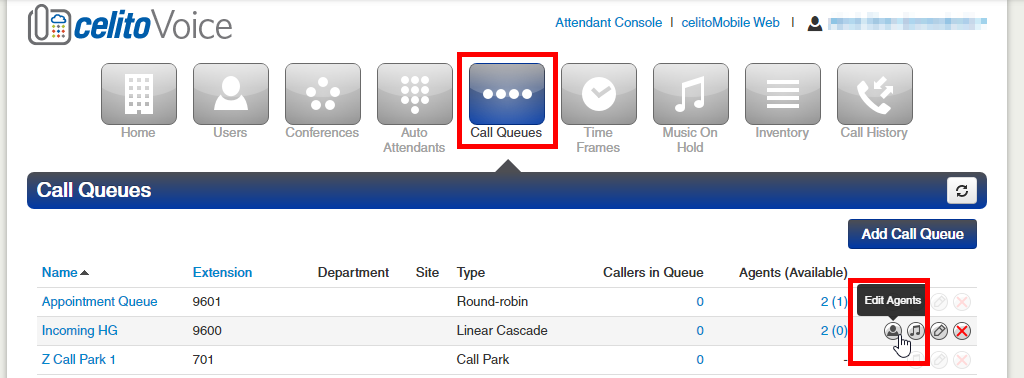
- Select
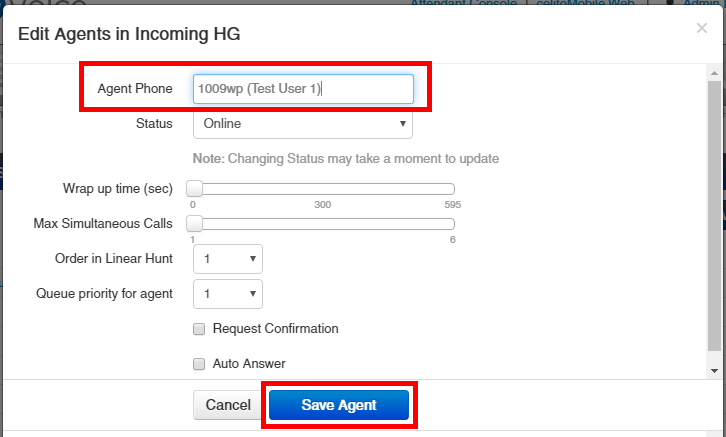
Add Agentand enter the extension found above in toAgent Phone(in our example we would enter 1009wp)- Set
Statusto Offline if you don't want this device to start receiving calls yet, or Online if you do
- Select
Save Agent
Join/Leave Queue
- To mark yourself as available/online in the queue, dial *10 from each device you want to receive calls.
- To mark yourself as unavailable/offline, dial *11 from each device


